Many years ago, before he passed away, my grandfather gave me his old Rolleiflex Standard Camera. In the summer of 2004, I decided to put it back into working order.
Though the camera was mostly intact, I found I needed to do some cleaning to get things (especially the shutter) working again. I took apart most of the camera, cleaned what I felt comfortable cleaning (be really careful with the lenses, and don't oil the shutter unless you know what you're doing). The focusing screen needed to be cleaned (and it's still not easy to see after cleaning), and a few of the screws that holds the top hood on were missing. I found replacement screws at a hobby store (they were inteded to be used for model trains). I even found a manual for the camera! Then, I started taking pictures.
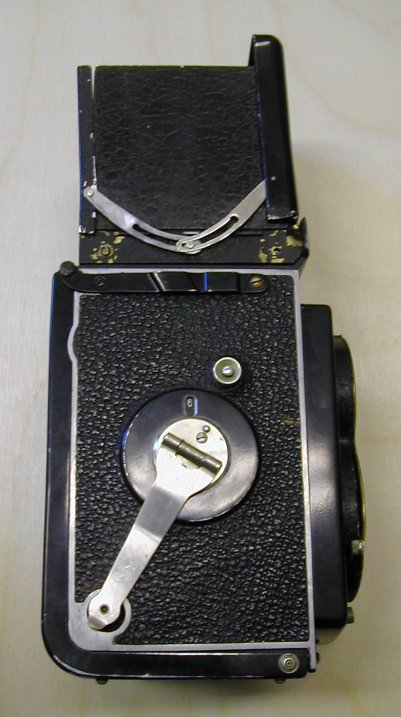
After running a few rolls of 120-size film, I tracked down what appeared to be a light leak in the camera. It turned out that the red film window on the bottom of the camera lets enough light in to fog the film I was using. It's the window on the right side of this picture (on the bottom of the camera):
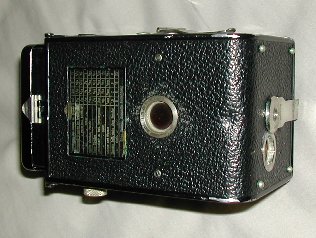
The light leak went away when I covered that bottom port. Note that I didn't have to cover the red window on the back of the camera, and it's a good thing, too, since that's where you can see the frame number on the film.
There's one repair that still needs to happen:
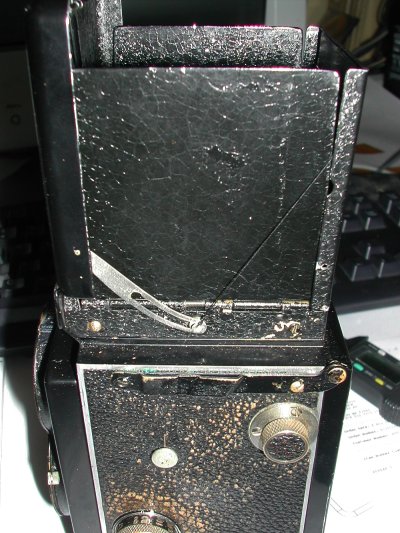
As you can see, one of the metal arms that stops the viewing shade from flopping over has come off and the one from the other side was lost a long time ago (before I got the camera) - I've got it held together with some thread. The tiny rivets that holds the arms on have also been lost, so I'll have to make new ones.
Updated November 23, 2004:
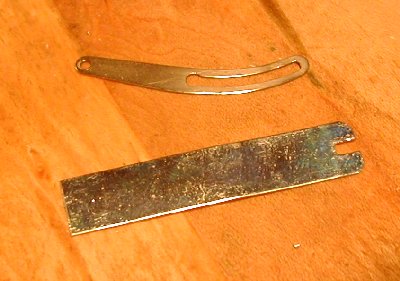
I made a second arm, so once I have the rivets made, the camera will be complete again.
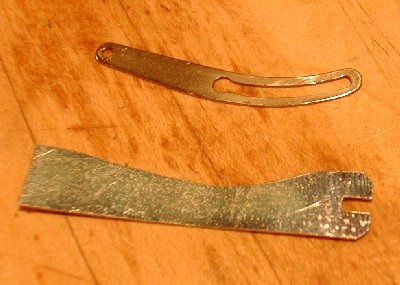
I started out with a piece of steel the same thickness as the arm and traced the outline on it:
Then, I started filing:
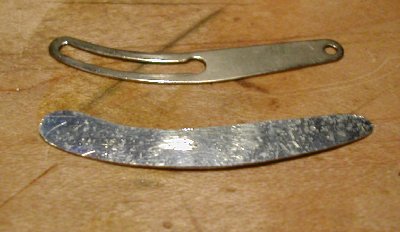
After more filing:
Finally, drilled some holes and filed a slot in the new piece, and came up with:
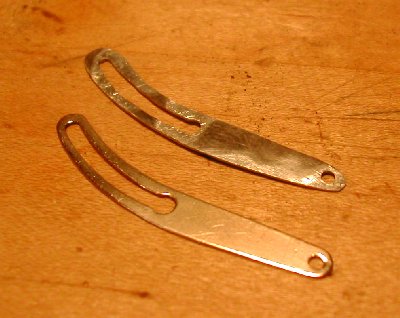
It isn't perfect, but it seems like it's gonna work just fine. Next step, rivets.
Updated November 29, 2004:
Well, check it out:
With the help of my jeweler/aunt, the metal arms (one original and the one that I made) have been reattached. We sucessfully made rivets out of nickel silver wire (harder than regular silver but easier to work than steel) over the weekend. I might touch up a few spots with some black enamel paint, but the camera's back in prime working condition.
Updated December 29, 2004:
On the way back from Thanksgiving in New York, the ground glass focusing
screen in the camera cracked:
It had some small chips before, so replacing it eventually was in the plan, but
now I had a motivation.
I bought a sheet of "micro plate" glass from a stained glass studio near
my office (don't know if that's an official term or just what they called it),
and it happened to be exactly the same thickness (about 1mm or 0.040"). I
used a strip cutter to cut pieces to size: 56mm x 64mm (2.20" x 2.52"). The
cost of the full sheet of glass plus the use of their cutter was $8 - what a
bargain!
I tried using sandpaper to create the necessary "frosted" effect, but it looked
scratched rather than frosted, and it was still too clear. Even with my
random orbit sander, it would've taken hours to scuff it up the required amount.
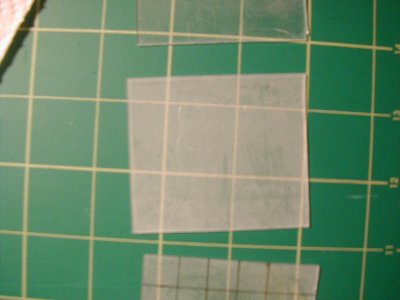
So I headed back to the glass studio and they helped me etch a few of the
pieces with some sort of acid. We first tried an acid bath, but it was hard
to keep the etch only on one side - the acid cream worked much better, and
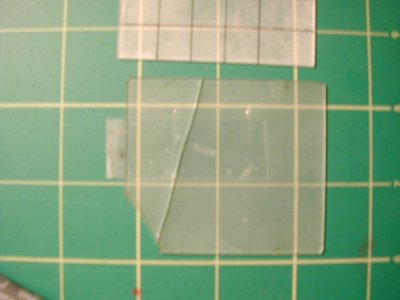
actually produced a more even etch. Check it out:
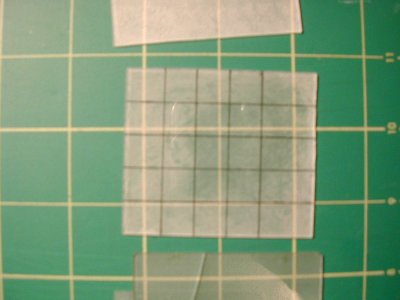
I used a thin, permanent pen to draw grid lines on the frosted side of the
glass (doesn't stick so well to the unfrosted side):
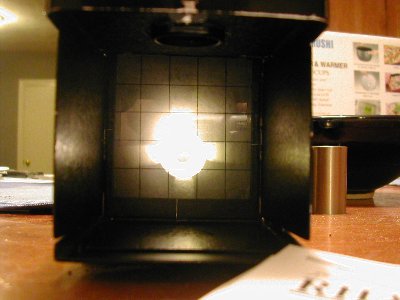
Here it is installed in the camera (which is pointed at the ceiling fan/light
in my kitchen):
All better!
Updated April 25, 2006:
Not that long ago, I received the following really nice note via email:
Nice job you did on the Old Standard. You mention the screen is really dim -
9/10 times this is caused by the mirror having degraded. They used old
fashioned silver (not aluminum) mirrors covered with shellac to protect the
metal against oxidation. The shellac turns yellow and the silver turns black.
NOT GOOD.
The best thing to do is to find one of those 1980's style polaroid cameras,
you know, where the photo slides out the front? I recently bought 5 for $10
at a junk store. Get out a screwdriver, mercilessly pry them open. You will
find a beautiful, front surface aluminum mirror in each. Carefully remove
the mirror and trash the camera.
If you go to home depot (or similar), you can buy a glass cutter. Measure the
original mirror, cut down the new one to size (it will be too big), fit it in
your camera, double check the focus, and you will find a much brighter view.
It doesn't matter if you get the edges perfectly straight.
Also note, the production date of your Rollei can be nailed down by reading the
date on the back of the original mirror. Because of the acidic paper used to
pack them, they had to be used within a 2-3 week period. So this means you
can date your Rollei down to the month.
Enjoy. Prewar I have a Rolleiflex Original, Old Standard, Rolleicord II, and
a prewar Automat II. I love them, espeically the Automat, which has an uncoated
Tessar f/3.5 (photos). I recently completed a full restoration on that camera
- it had the haziest lenses I have ever seen but they came 100% clean. Your
self portrait has the Rollei magic!
Cheers
Mike
Thanks, Mike! I really do appreciate the info, and will definitely check out
replacing the mirror.
[ I think the self-portrait he refers to is actually the photo of my brother
below, but it's not labeled as such. It was a reasonable assumption that it's
of me. ]
Specs/Details for my camera:
My camera was probably made sometime in the mid-1930's, based on the serial
number and this page.
Still takes really nice pictures:
You can see more pictures I've taken
here.
Dave:
Camera Serial #207479
Viewing lens: Heidoscop-Anastigmat 1:3.1 f=7.5cm (serial #204667)
Taking lens: Carl Zeiss Jena Tessar 1:4.5 f=7.5cm (serial #1308283)
